Central Resource for Ford Festiva (and related vehicles).
I edit and access this blog infrequently and do not reply to comments here. Please leave your comments about it as a post on fordfestiva.com if you want a a reply.
This Article was originally created by a member of the fordfestiva.com forum called David88 and is published here with his permission. Materials needed:
Replacement glass.
Rubber seal (from the old glass)
Small heavy-duty cord 1/8” to 3/16” (weedeater line works great)
Phillips screwdriver.
Glass cleaner.
Thick blanket.
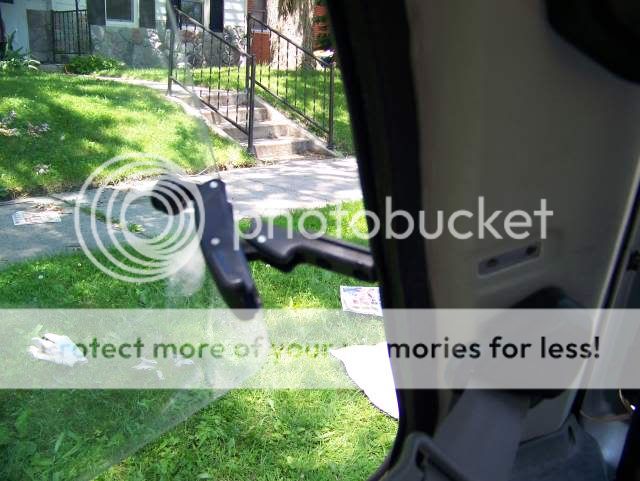
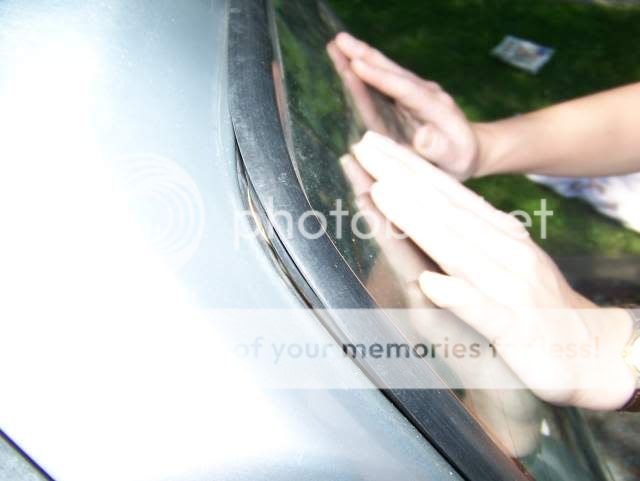
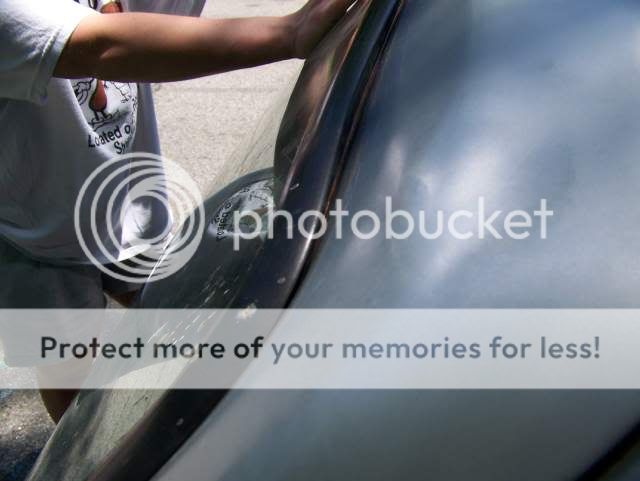
Estimated time for install: NONE! Go slow take your time. Caution: Handle tempered glass with care. It is relatively tough but the slightest tap on the edge could shatter the entire piece. Protect that edge! Gloves and eye protection would be a good idea. First clean out all the broken glass from the old rubber seal. Check to see that it is on good condition. Since this glass installs with no glue or sealant of any kind the seal should be a continuous loop with no cuts. If not replace it with a good one. - Remove the rear side window hinge to body screws and move the windows out a bit.
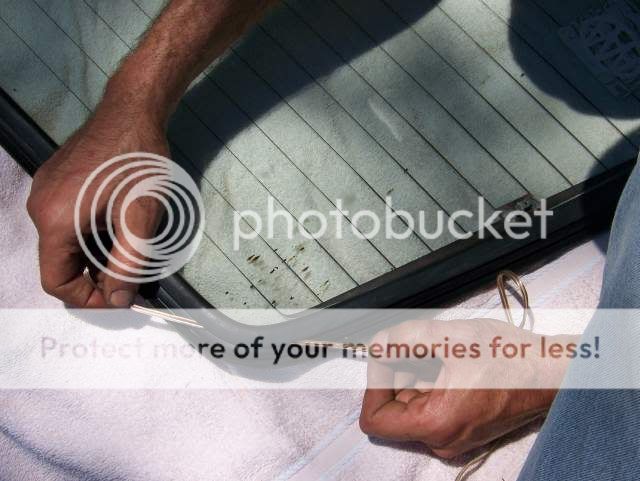
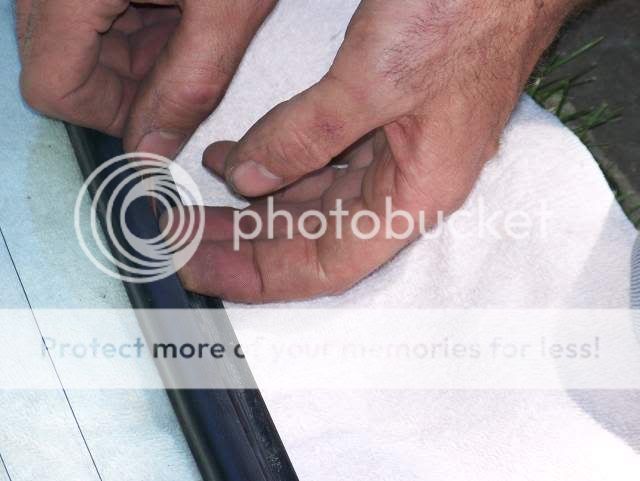
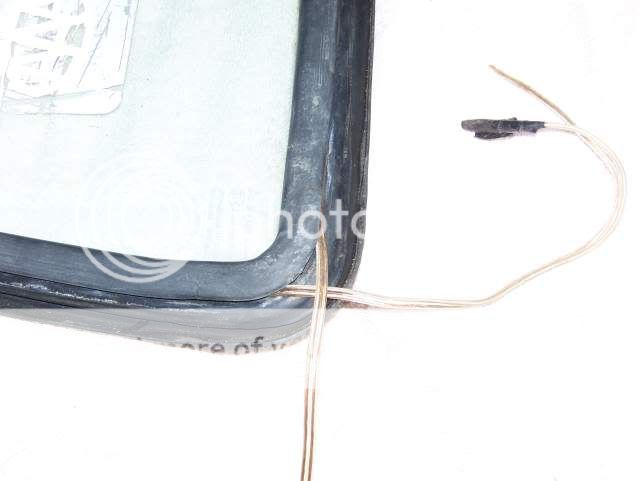
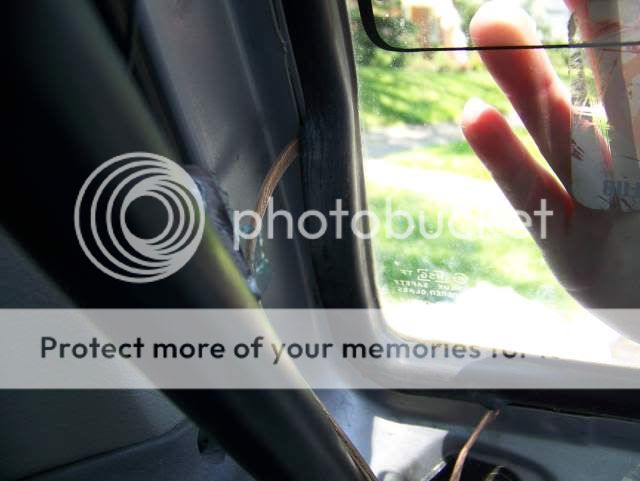
- Lay the glass on the blanket with the inside of the glass facing up. - Thoroughly clean the replacement glass paying attention to the edges that will be under the rubber seal. Any dirt or dust left there can wick moisture under the seal and can be a potential leak. - Install the rubber seal on the glass. Tape if needed. - Insert the draw cord in the channel of the rubber seal (flange side) and over lap the cord 18” at the center of the top. Tape the loose ends to the glass.
See footnotes!
Instead of crossing at the corner as shown, you should cross at a center point.
- Place the glass in the opening; then, with have an assistant apply pressure from the outside.
- From the inside of the car use the draw cord to pull the lip of the seal over the opening flange. Pull each end of the draw cord alternately across the top and around each bottom corner so you finish at the bottom center of the window.
Reattach the rear side window hinge screws. Here is a short video of the draw cord being pulled while pressure is applied from outside. http://www.youtube.com/watch?v=OIZDhTjusOE
Here is the car about 1hr later. I was very fortunate to have a spare defrost rear glass on hand. It was very frustrating to be a victim of this random damage , but also satisfying experience to repair it ourselves. I hope the article can save help you do this job, save you some money and give you that good feeling of DIY. Thanks to my wife for her help and patience.
- Post notes: IMPORTANT: The pictures show the cord overlapping on the corner. The correct way is to overlap in the center and work outward evenly as stated above. Also, I improvised and used heavy speaker wire for the draw cord. This turned out to be a bad idea because it started breaking near the end. I believe clothesline would be a better choice. Note: Another member added a comment that weed eater line worked great. A member asked about How to remove the glass in a later post and David88 added this comment: Good questions! Yes. There are a couple of ways to do it depending on if you want to save the weather seal or not.
If you can use you old seal and are not concerned with saving the one for the donor vehicle, then you can use a sturdy razor knife to carefully cut the inside lip from the weather seal have someone help you hold the glass on the outside. Gently push the glass from the inside top. It should lift out easily.
If you need the seal and glass from the donor then fold the rearseat back forward. Climb inside the hatch area and close the hatch.
Start at one top corner and pry the inner lip if the seal down with you fingers while applying steady pressure out on the glass. Work your way across the top. Before you push too far out in one area, move along and lift the lip as you go. As you get closer to removing the glass have someone old it from the outside so it doesn't flip out on the ground.
Again, don't hurry. If you get tired take a break. Go slow. Good luck.
When I did this I used my feet to push out on the glass. The can be quite a chore. The more help the better. Someone to push while you work on the seal would be ideal, if a bit crowded. It was in the 40's when I did it and the rubber was stiff! I used a plastic putty knife to start to lift the seal. It takes quite a lot of pressure at first. Once you get the seal pushed past the flange, it will go easier. With the hatch removed from the car, I have removed the glass myself by laying the hatch on a nice soft carpet (make sure no rocks or metal pieces in it) outside down. Place your foot on the glass at the top left corner and then start pulling up on the hatch. The glass will pull the rubber seal out as you continue to make your way around the top and side. Once you get that far you should be able to lift the glass out of the seal and the pull the rest of the seal off the hatch.